You can click one of the Steps to jump to a section, if helpful.
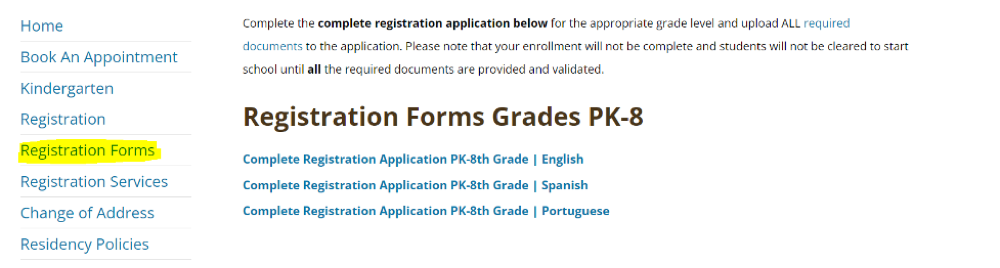
STEP 01 – VISIT ONLINE APPLICATION
To begin navigate to Registration Forms and Click on the “Complete Online Registration Application…” link. Choose the correct application based on the child’s grade (PK-8 or HHS)
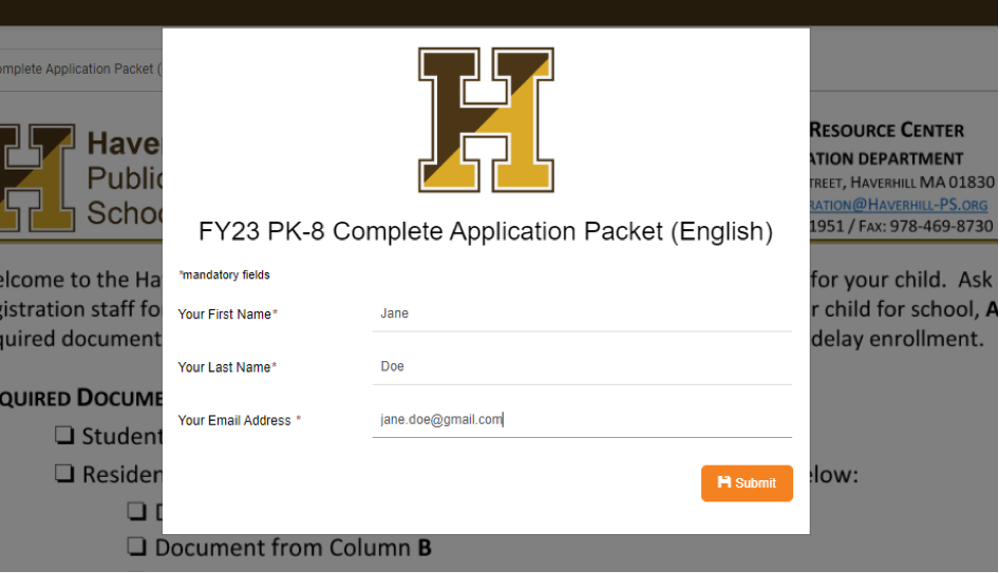
STEP 02 – ENTER NAME AND EMAIL
After clicking on the application, enter your Name and Email address on the pop up screen to access the forms.
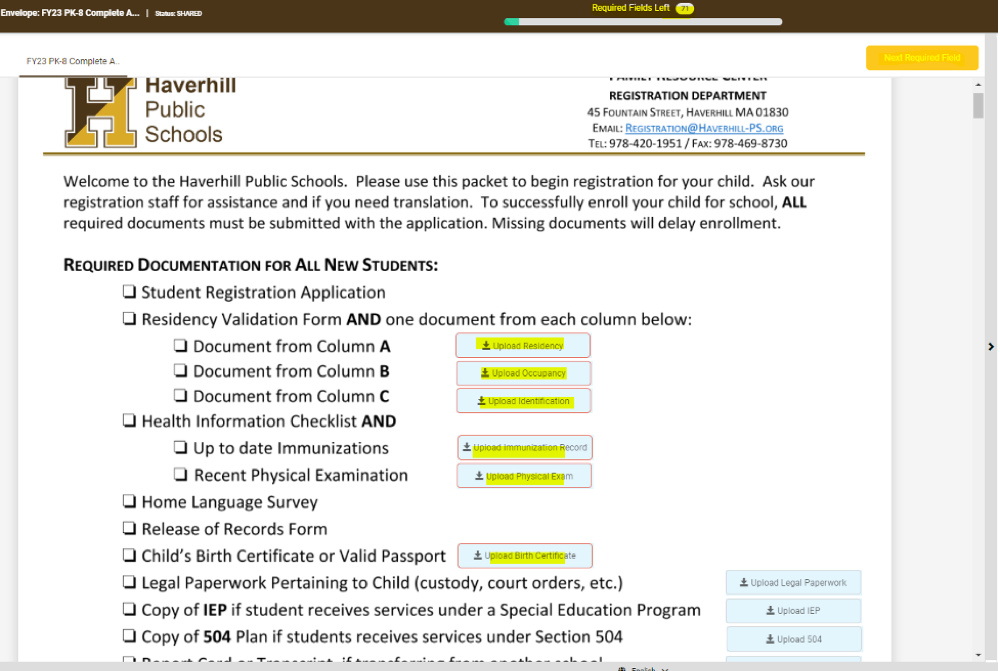
STEP 03 – UPLOAD REQUIRED DOCUMENTS
On the first page, you will need to upload the required documents. Click on the upload fields and choose a saved document or take a picture of the document to upload.
The required documents you should have ready include:
- Child Birth Certificate or Passport
- Parent/Guardian photo ID
- One Proof of Haverhill residency (ex. Copy of mortgage statement or signed lease agreement, Copy of rental payment with landlord affidavit, Property tax bill or Section 8 Agreement)
- One Proof of Haverhill Occupancy (ex. Recent utility bill dated within 60 days, Excise Tax Statement, Car Registration from RMV, Lease agreement stating landlord pays utilities)
- Updated Immunization Records
- Recent Physical Exam (including Vision screening results, TB test or low risk results and Lead test results)
- Transcripts, if transferring from another school
- Any Custody or court Documents, if Applicable
All necessary documents are listed on the form.
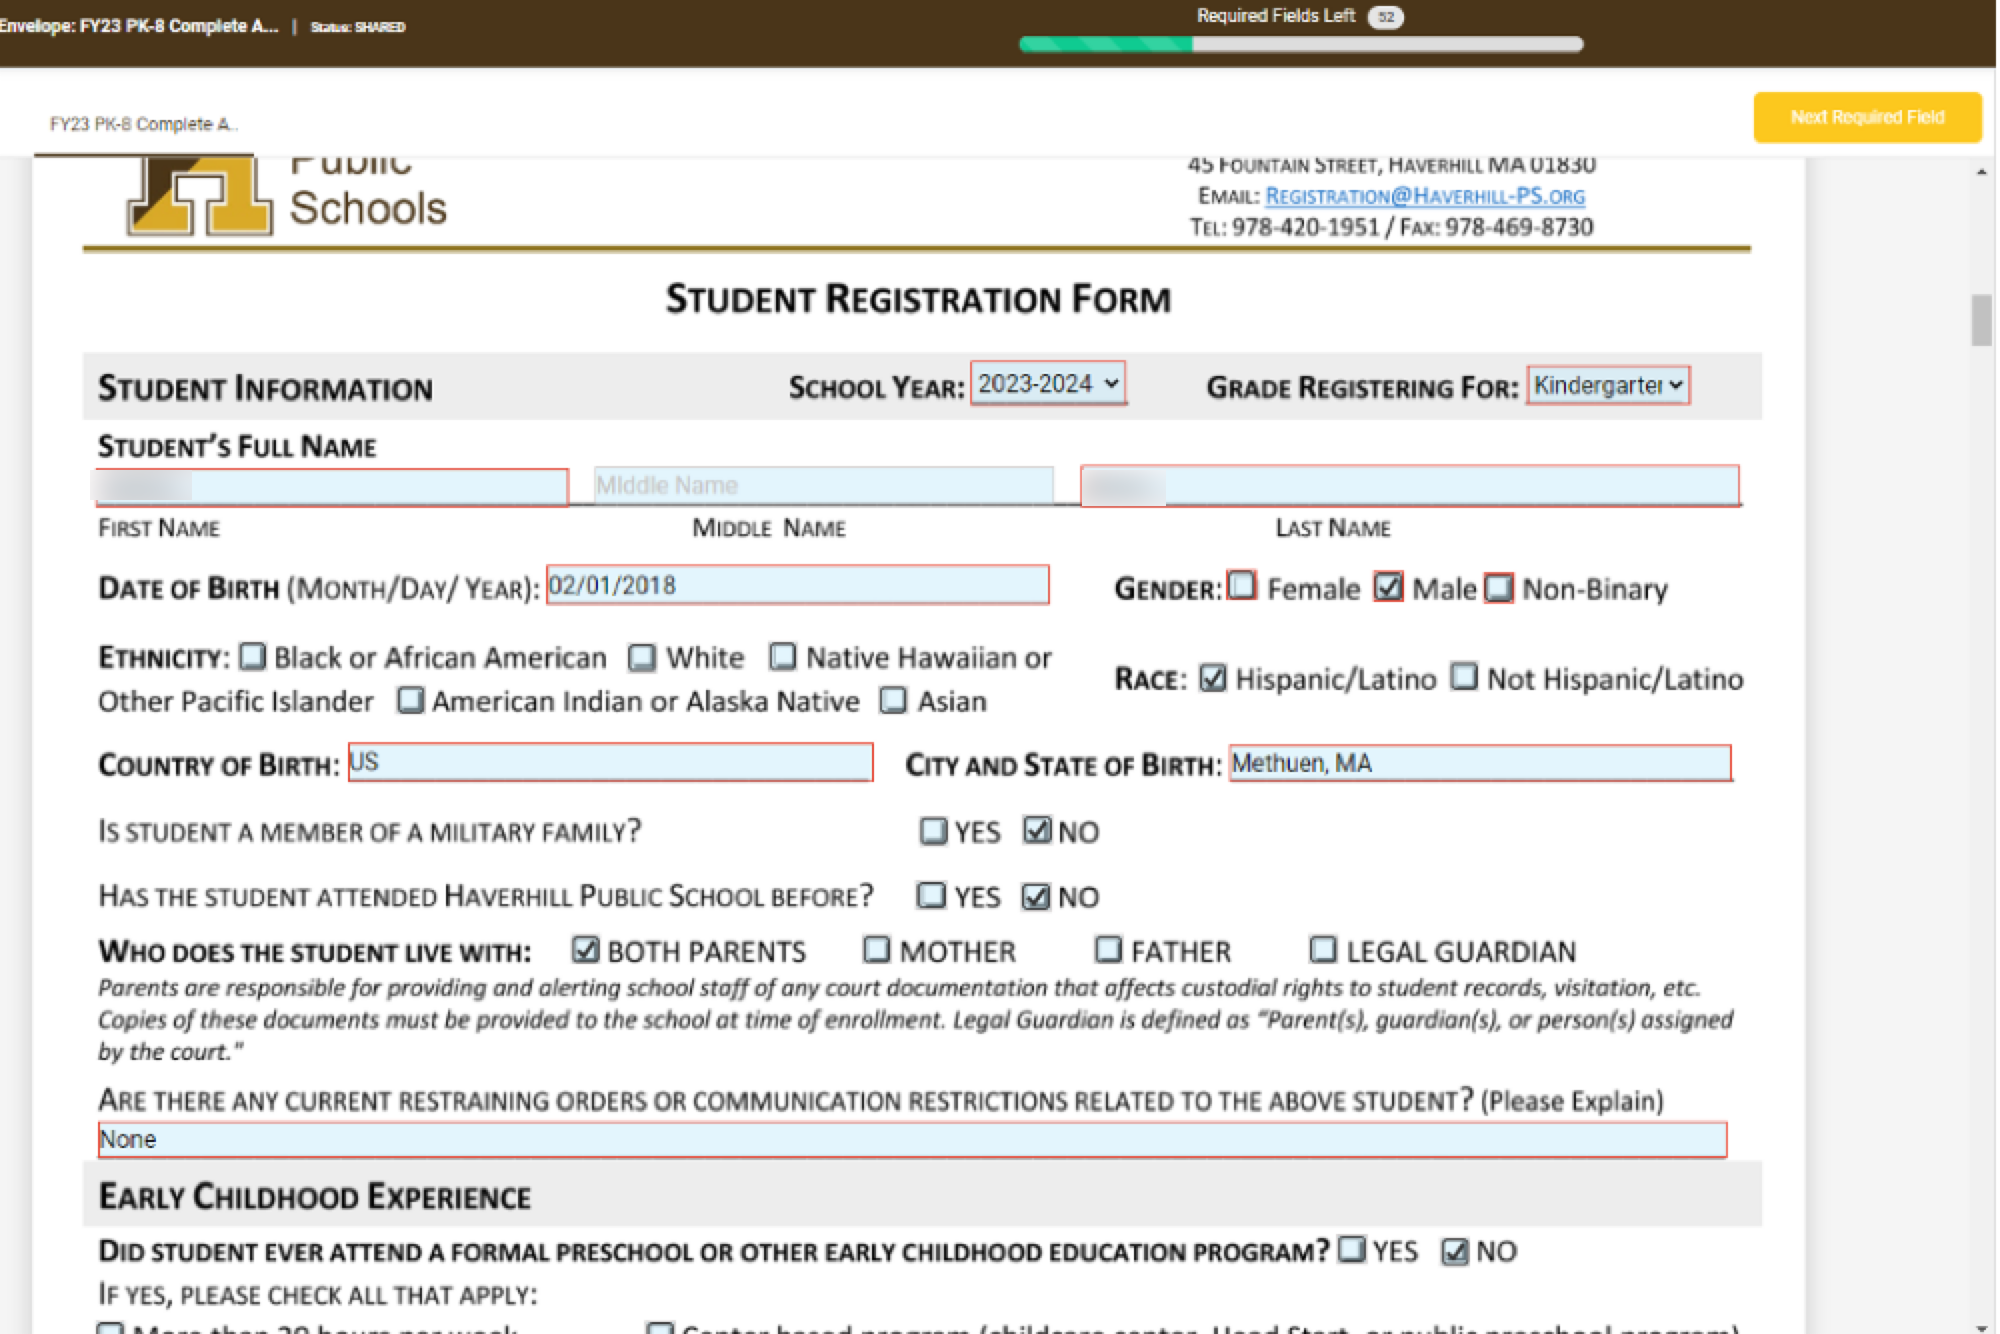
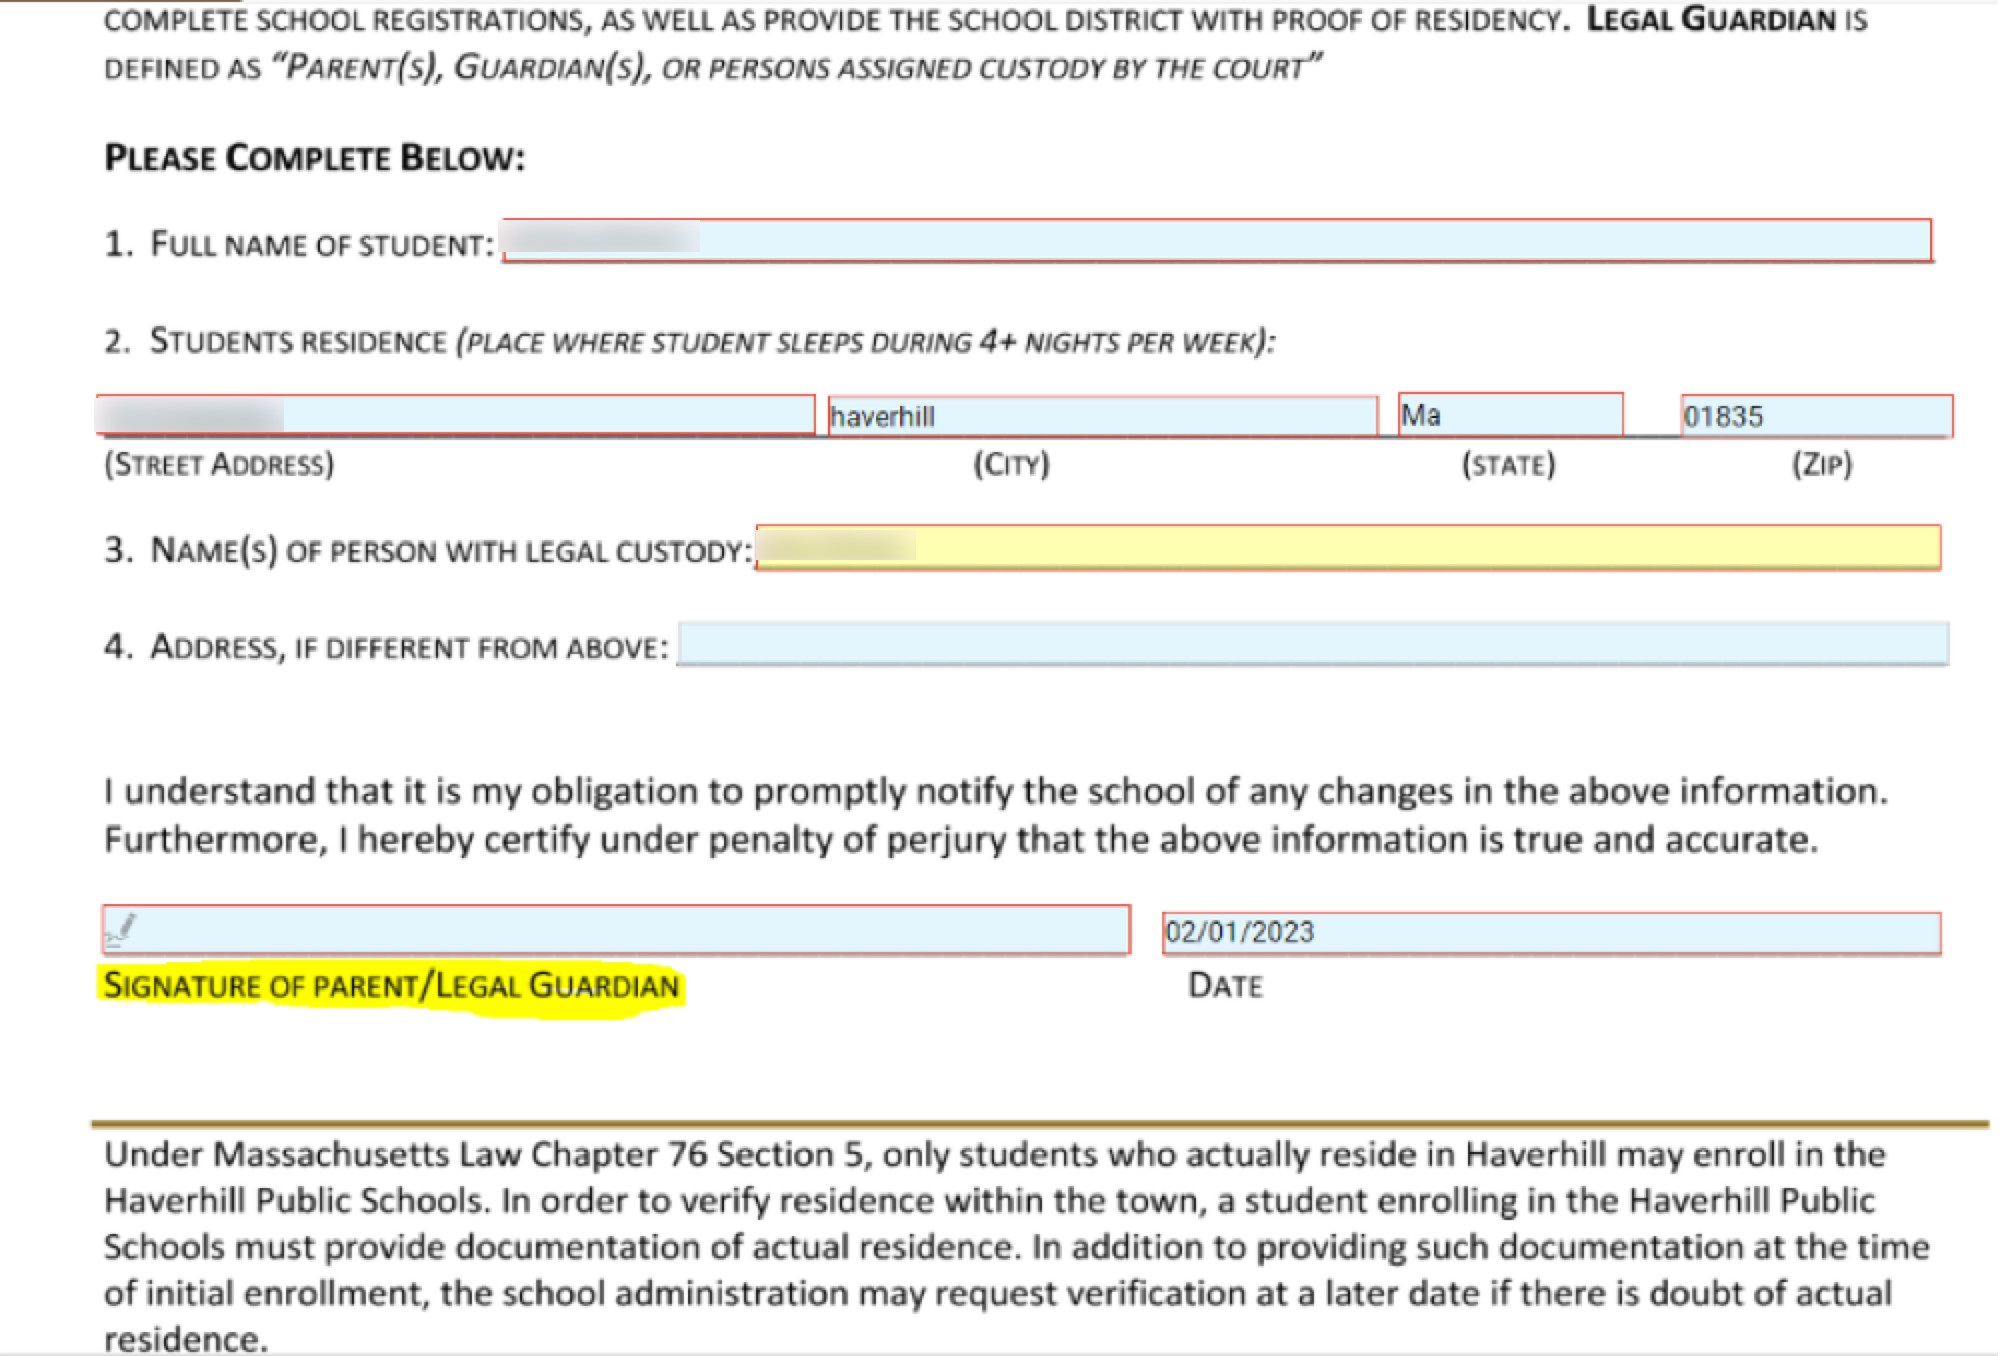
STEP 04 – COMPLETE ALL FIELDS
Complete ALL the fields on the form (While most field show required, all available fields need to be completed). If something doesn’t apply to your family, enter N/A or No.
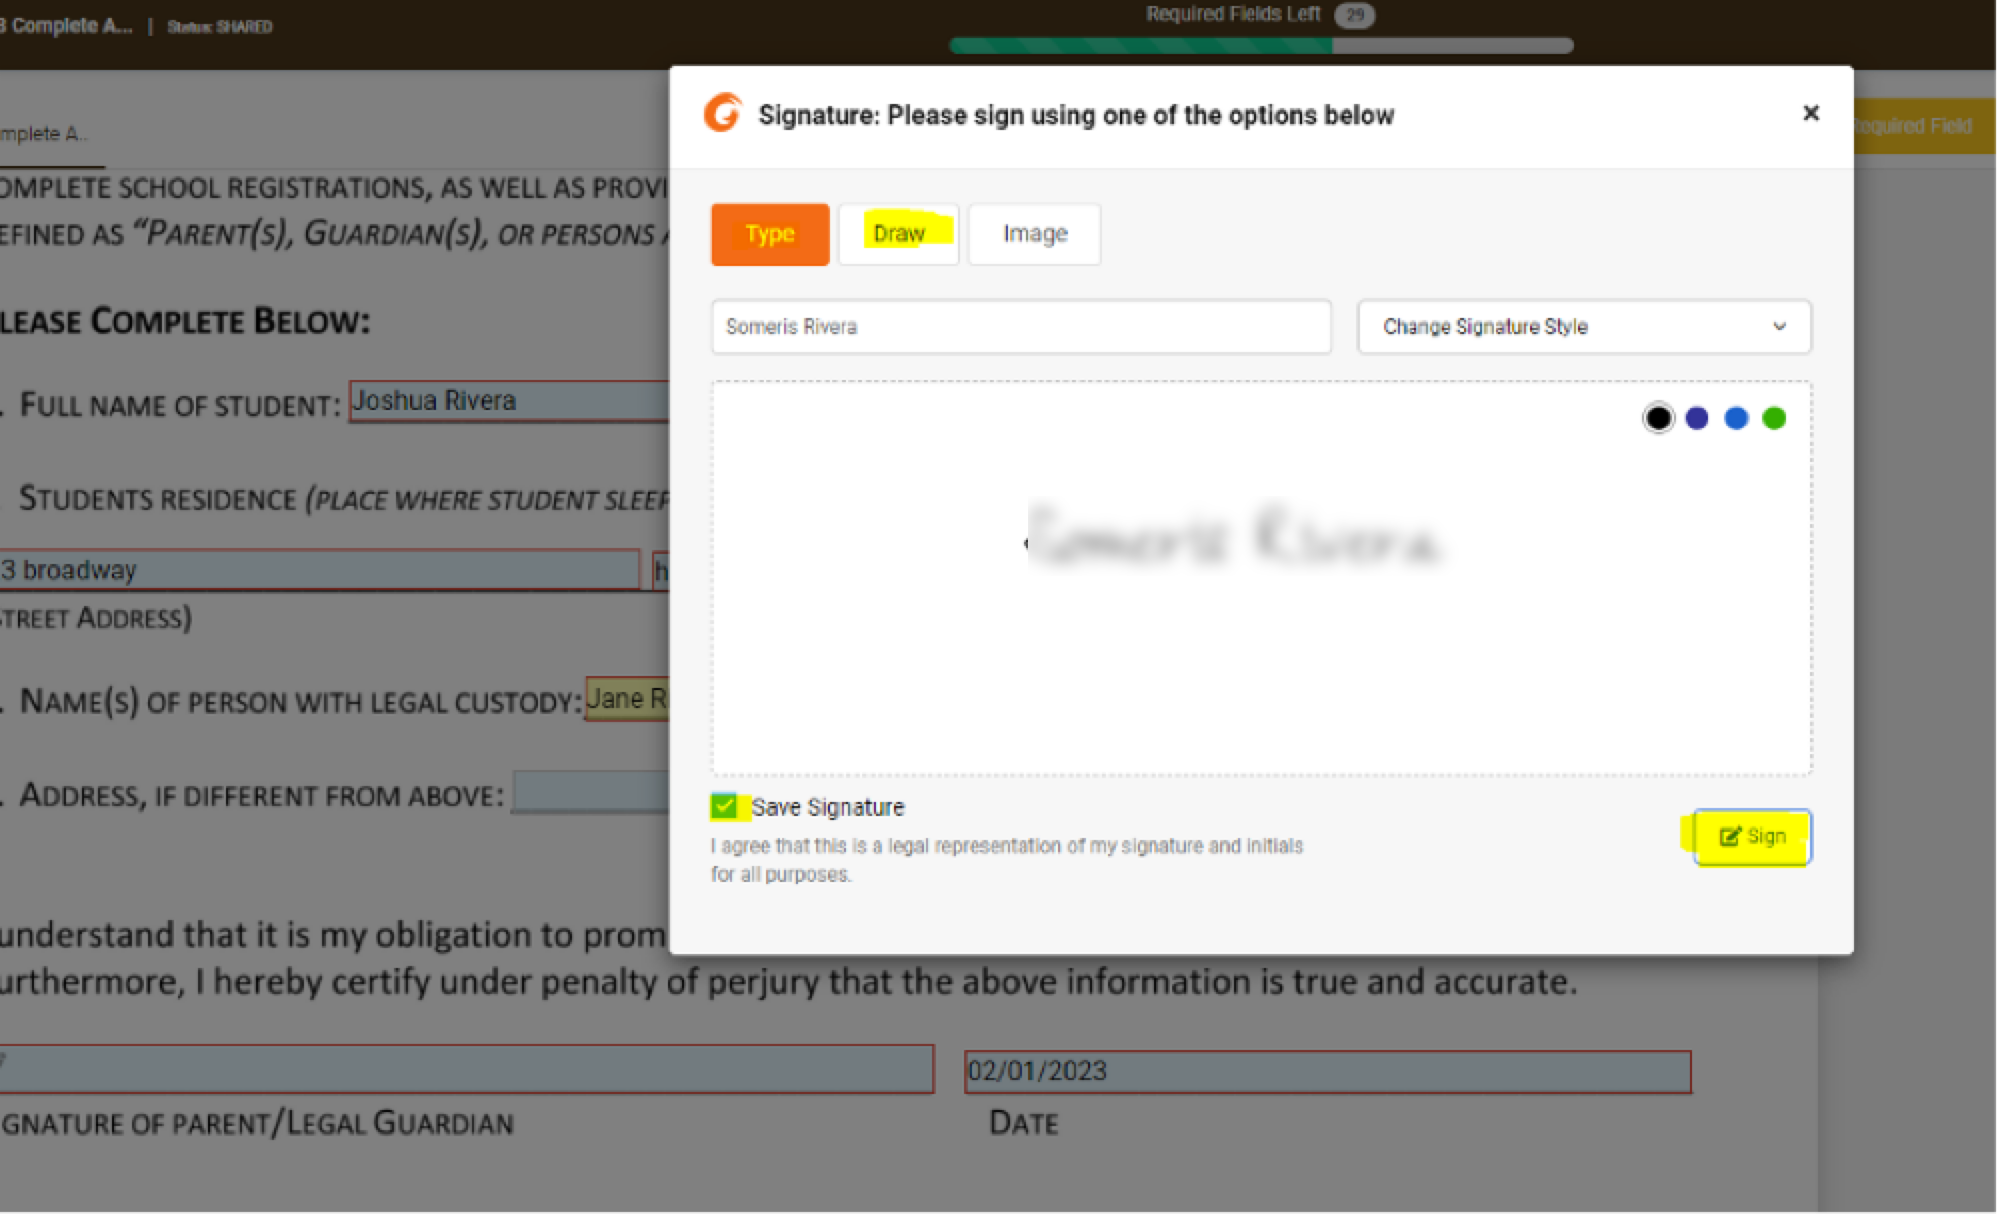
STEP 05 – SIGN E-SIGNATURE
Click on the “Signature Field” to select an e-signature.
STEP 06 – SAVE SIGNATURE
After clicking on the “Signature Field” a screen will show up where you can select your signature style, check off Save Signature and then click Sign.
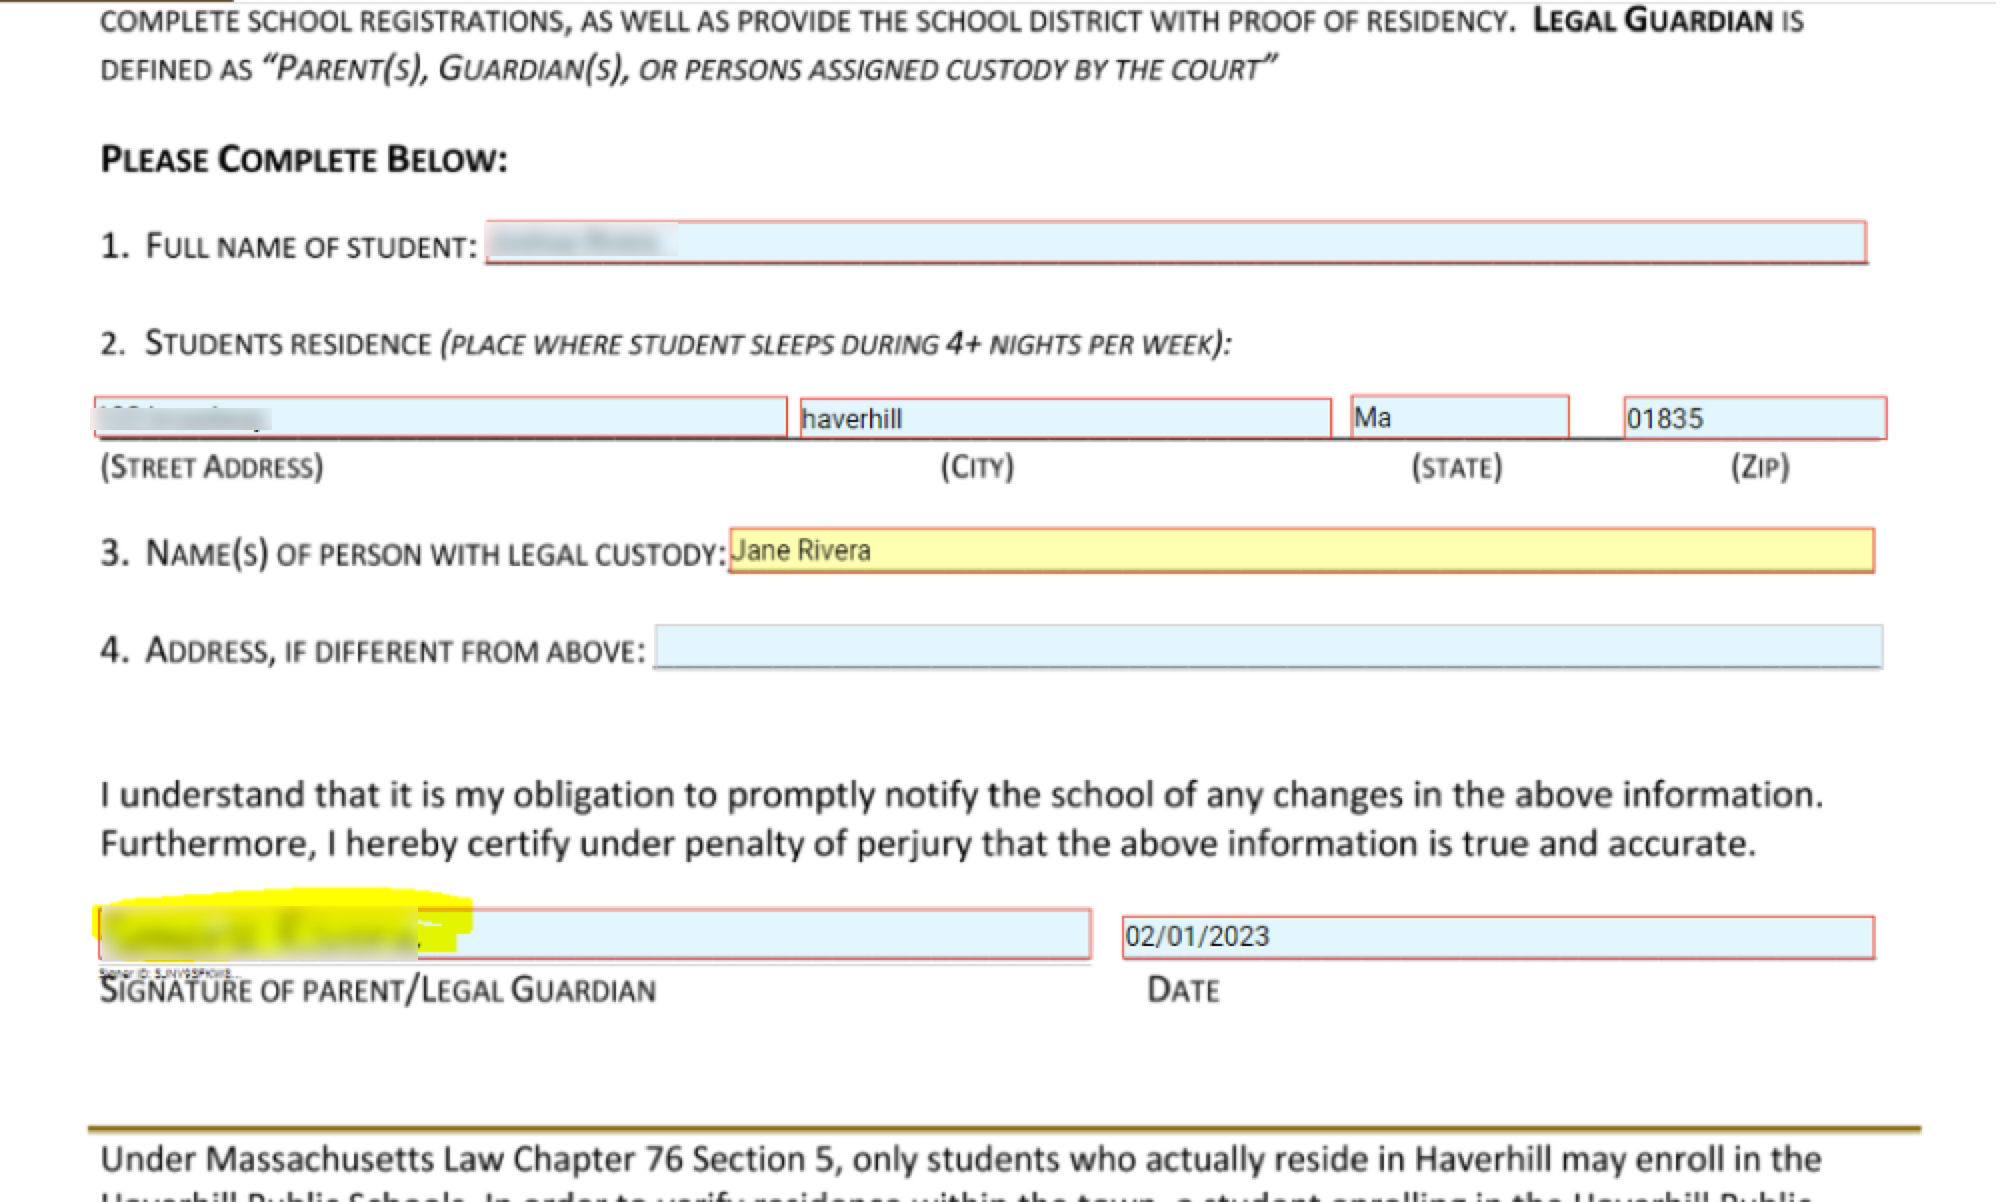
STEP 07 – SIGN ALL E-SIGNATURES
Once done, you should see your e-signature on the document. You can then, populated the rest of the signatures by just clicking where it states “Signature of Parent/Legal Guardian”.
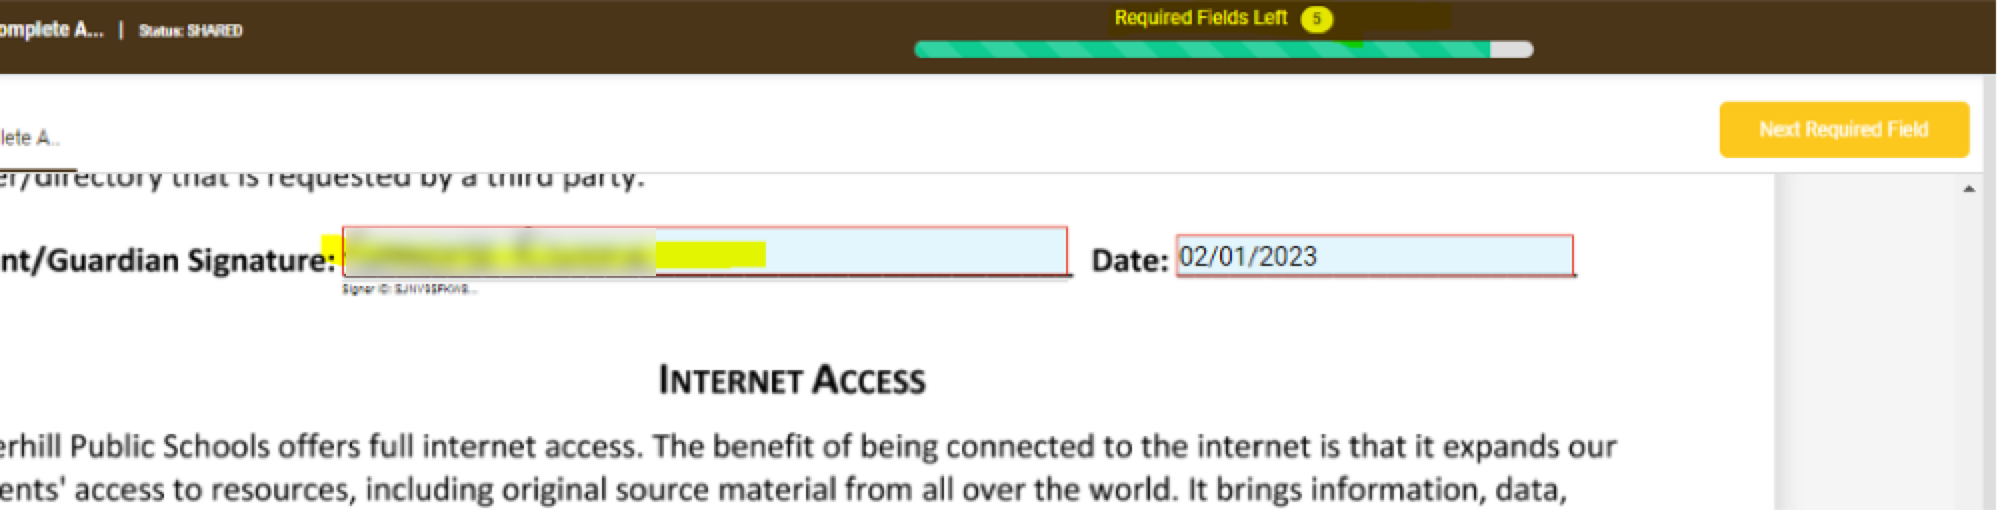
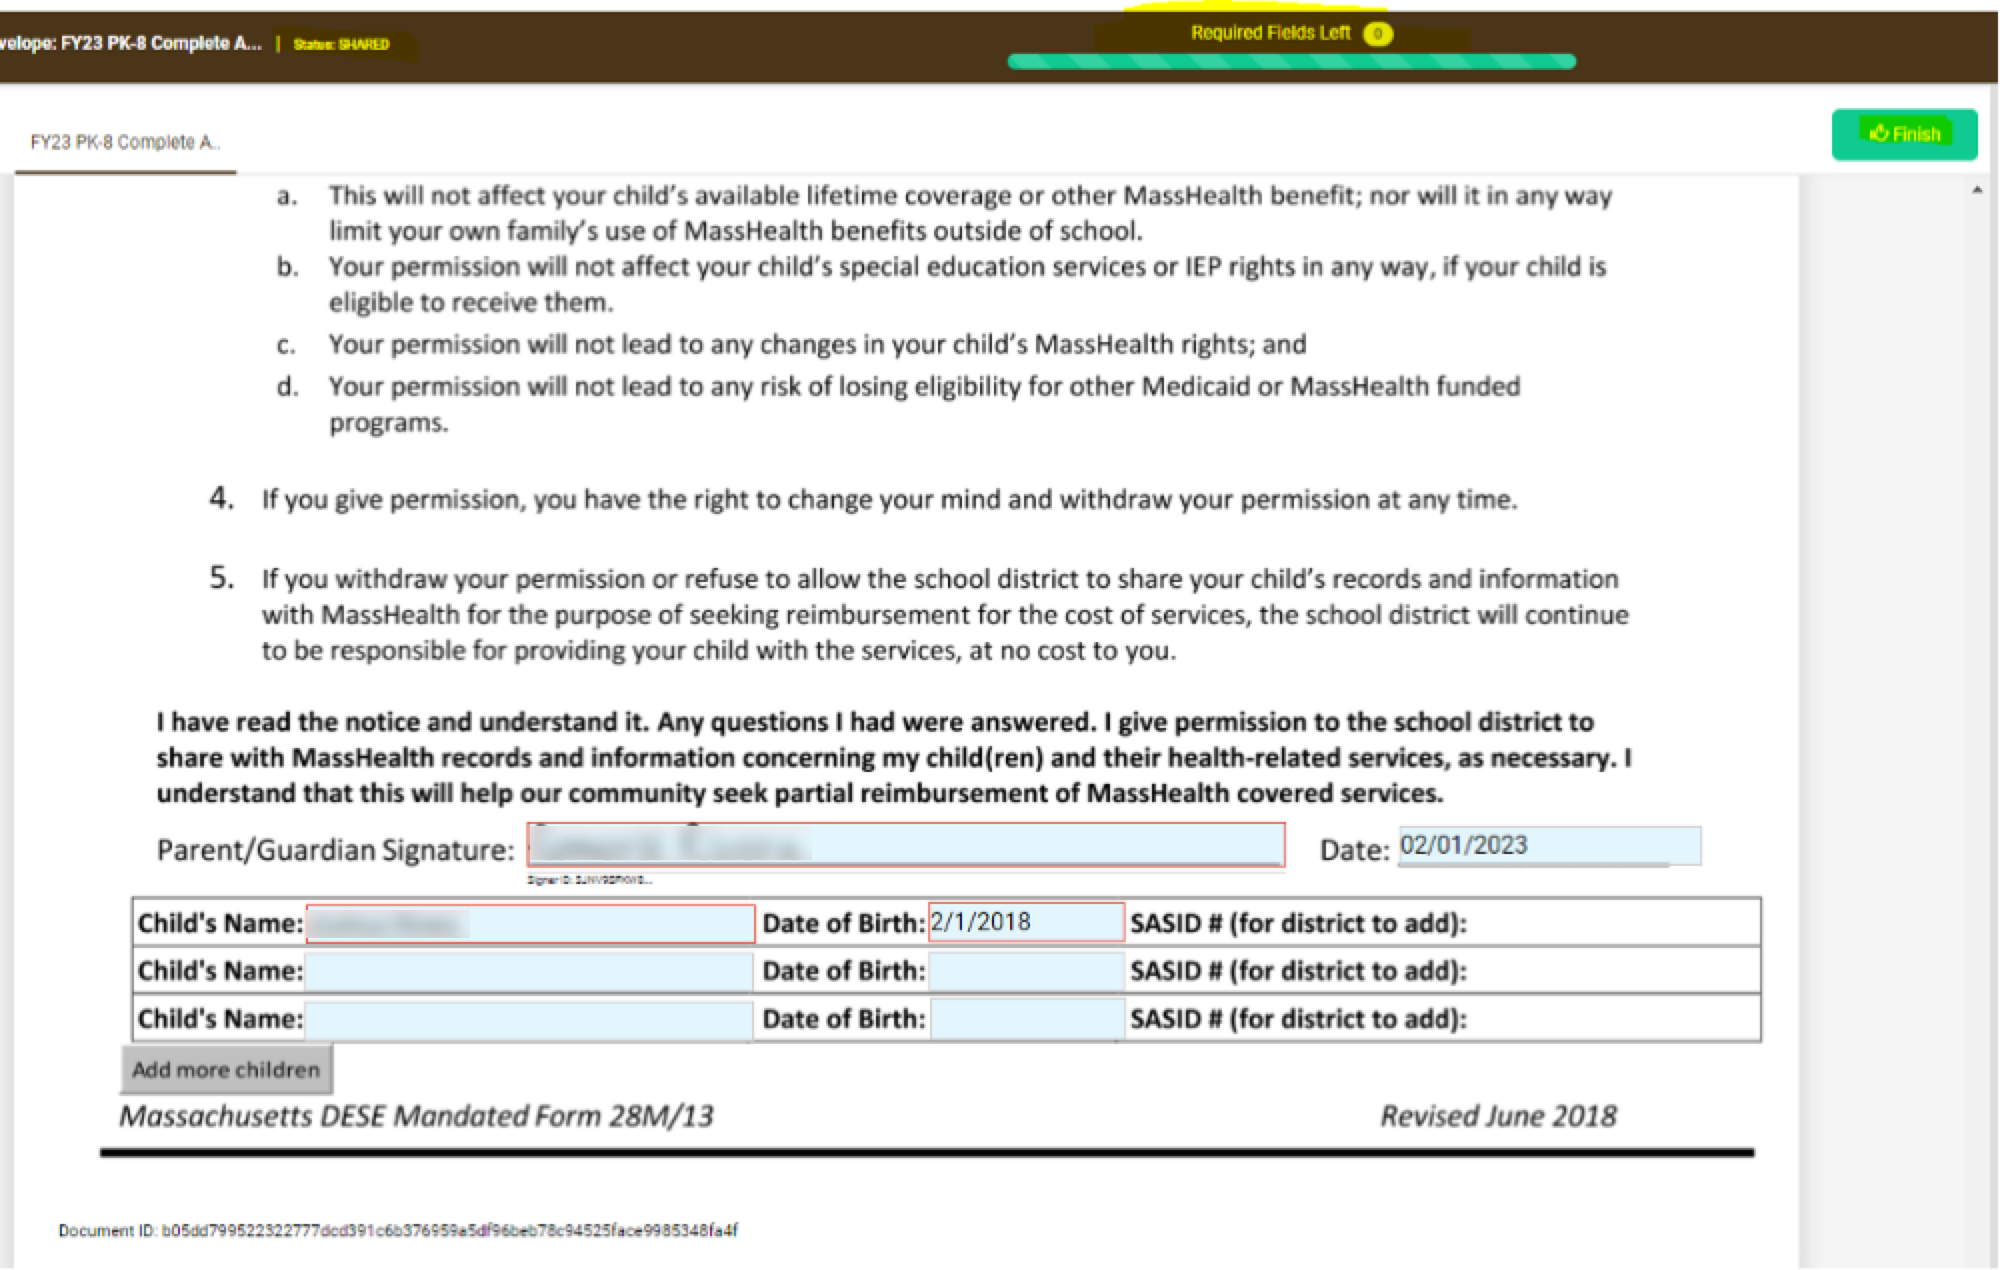
STEP 08 – TRACK PROGRESS
At the Top of each page, you can track the progress of your application to see how many fields/pages are left. If you completed everything successfully – You will see zero ‘0’ fields left and the Green FINISH button on the top of the page.
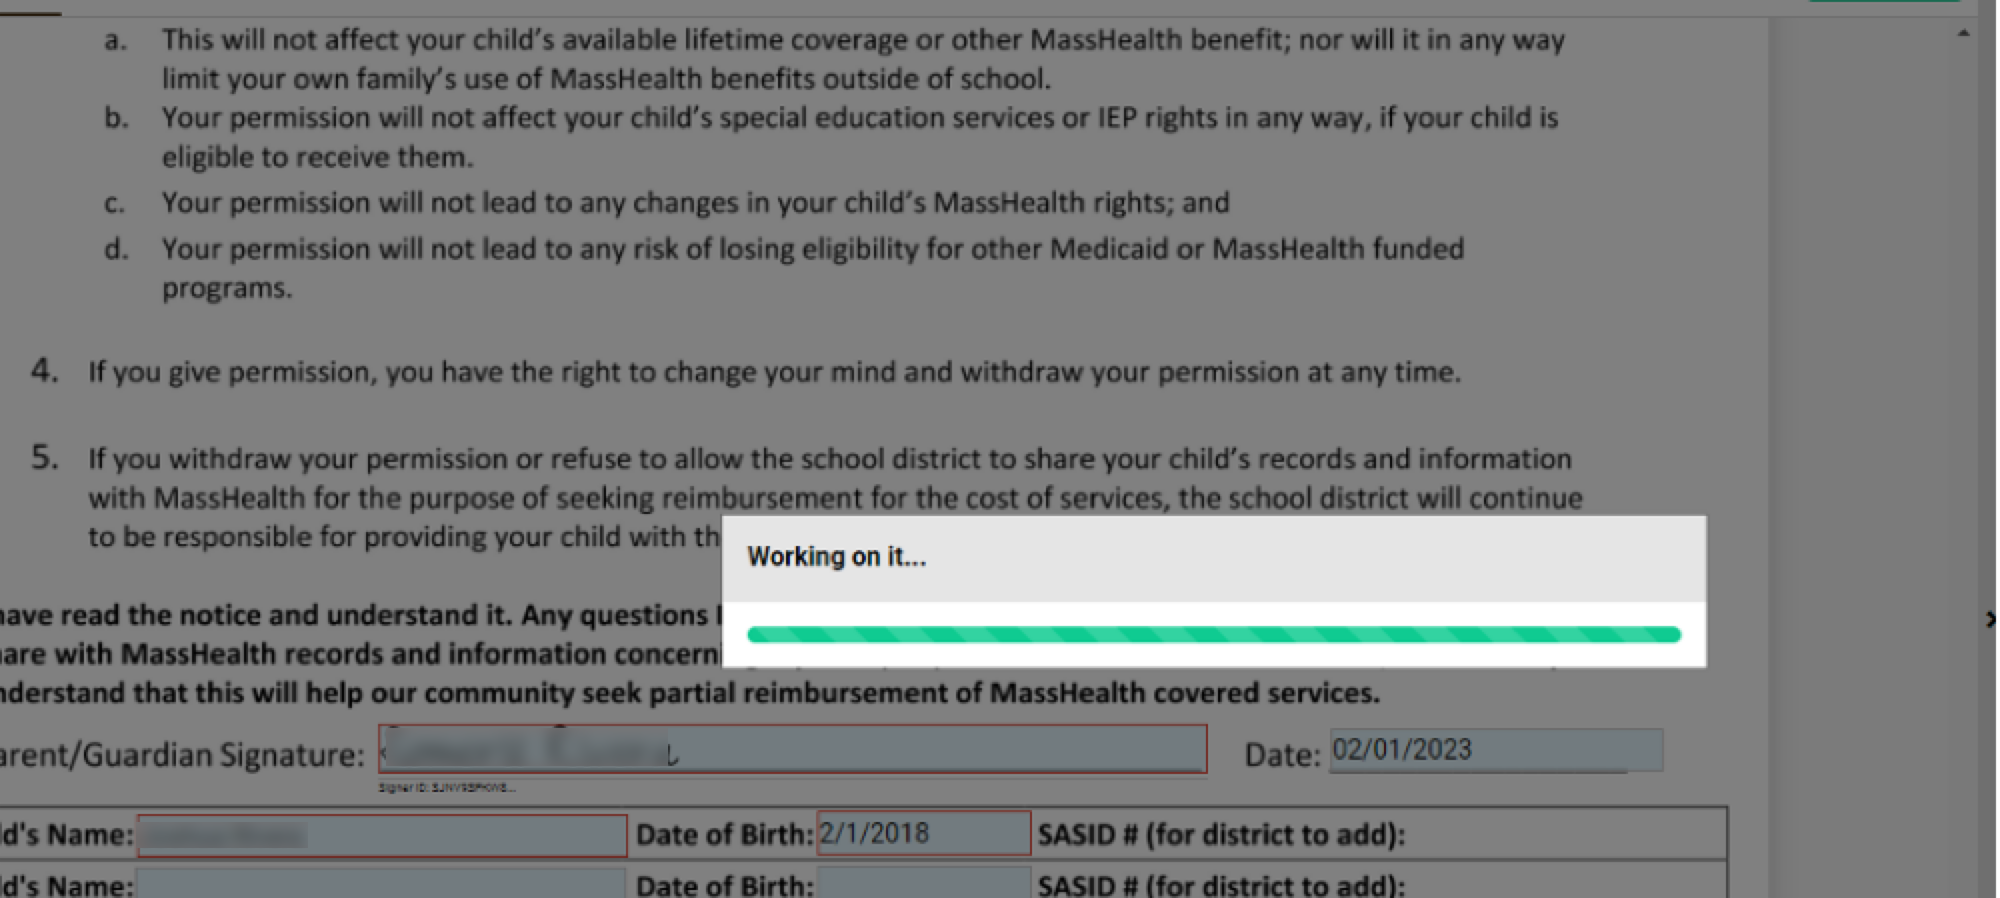
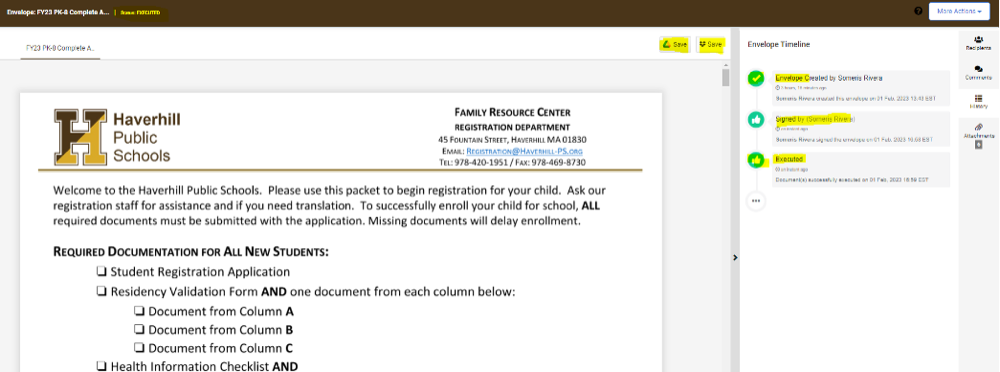
STEP 09 – “EXECUTED STATUS”
Once you click FINISH, you should see “Executed” – This indicates the application was successfully completed the submitted to the Registration Department for review.
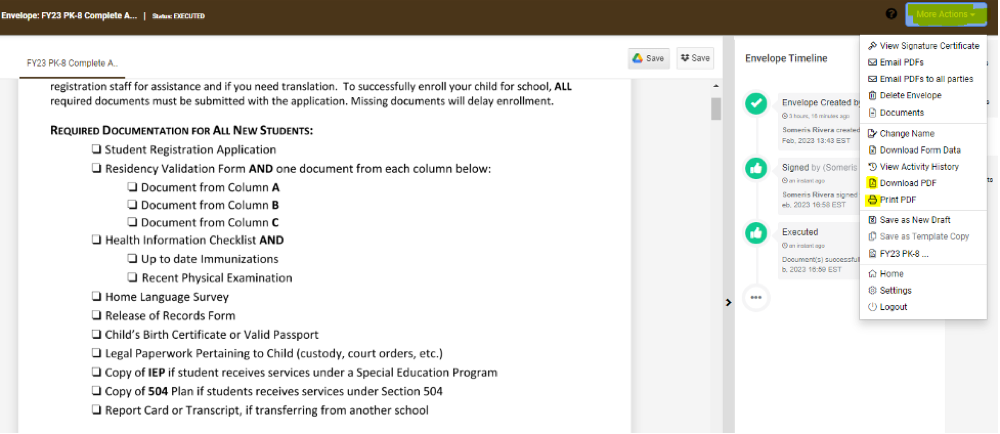
STEP 10 – SAVE YOUR APPLICATION [OPTIONAL]
You have the option to save your application. You can also download, or print a copy of your application by clicking on “More Actions”.
You will receive a confirmation email once your application is successfully submitted.
Reasons your application was not submitted to the Registration Department:
- Some required fields are missing or incomplete
- Missing Signatures
- Not all required documents were uploaded